Part 4: Cataloging – How To Install and Set Up Koha For Schools
After a long break, we continue today with the series “How to install and set up Koha for schools”. After the system has been installed, the bibliographic framework has been set up and basic settings have been made, this article will deal with adding of books in Koha and cataloging.
This article is part of a series:
- Installation and Setup of a First Library
- The Bibliographic Framework
- Basic Settings
- Cataloging
- Printing Labels
- Circulations and Fines Rules
- Connecting to a Z.39.50 / SRU Server
- Notifications and Reminders
- Overdue Notices and Fees
Cataloging
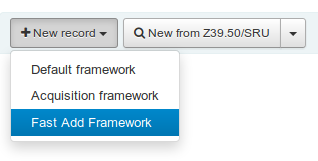
We can record a new book under Cataloging → New Record → Fast Add Framework.
An input mask appears, in which we can enter all important data to our book. As an example I have chosen the book “Something Else” by Kathryn Cave.
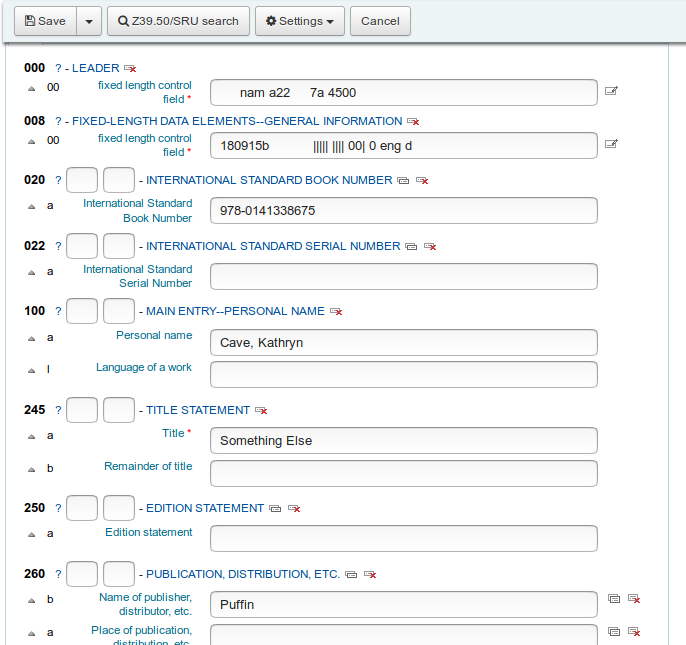
With a click on “Save” at the top of the screen we get to the next input mask.
Add An Item
We have recorded the title so far. Now we can add items to this title. In a school library this is usually one item. Sometimes, however, there are several items of a title (especially if you include textbooks in the system).
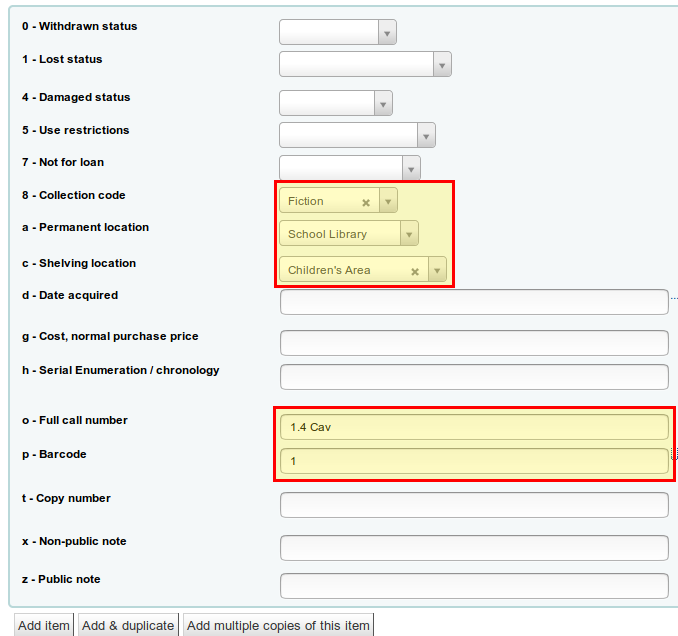
The most important fields are the collection, the location, the item callnumber and the barcode. The other fields can be filled in additionally. The barcode should be generated automatically if you click into the field and have activated the system setting “autoBarcode” (see part 3 of this series). Under Collection all values appear which we have also set up in part 3 under “Authorized values → CCODE“. The same applies to the shelving location (“Authorized values → LOC“).
Signatures and systematics
Depending on the size of the library, it makes sense to introduce a system for your collections. A system describes how to group the books and arrange them within the library. There are different systems for this and in general it makes sense to have a system that is based on the city library or another library in the vicinity. So the children quickly find their way around and learn how to orient themselves to a library. In general, the systematics should be as simple as possible in order to enable quick orientation.
Each category therefore has its own color and abbreviation, which we can use for the item callnumber.
There are also different systems and possibilities for signatures. We have decided to combine the abbreviation from the collection with the first three letters of the author. In our case “1.4 Cav”, i.e. “1.4” for picture books from 3 years on and “Cav” for the first three letters of the author’s surname. But it is also possible to assign consecutive numbers.
With a click on “Add Item” the item is saved in Koha.
Conclusion
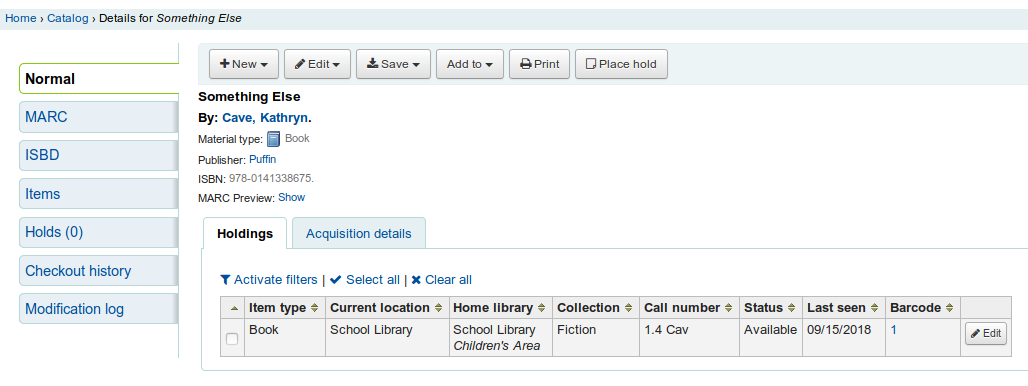
We have now added our first title to Koha. Following the same pattern, more books or other media can now be added to Koha. The next part will deal with the printing of labels (with barcode) and spine labels.


0 Comments