Part 2: The Bibliographic Framework – How To Install Koha And Set It Up For Schools
In the first part of this series we have already installed Koha. Before we can record or loan a book, some settings have to be made. A major topic is the bibliographic framework. We already chose MARC21 at the installation. What that is, why it is important and how we can adapt the framework for a school, that is what part 2 is about.
This article is part of a series:
- Installation and Setup of a First Library
- The Bibliographic Framework
- Basic Settings
- Cataloging
- Printing Labels
- Circulations and Fines Rules
- Connecting to a Z.39.50 / SRU Server
- Notifications and Reminders
- Overdue Notices and Fees
What is the bibliographic framework?
It is best to imagine the bibliographic framework as a template for books or other media to be recorded in Koha. In this template we define what data we want to have in our system. These could be, for example:
- Title and Author
- Publisher, place and year of publication
- ISBN / ISSN
- age restriction
- language
This list can be extended at will, but for a school library we want to make it as easy as possible. These data are also called fields.
So that not every library has to think up its own fields, a standard was created many years ago, which is used in Koha: MARC21.
MARC21
Wikipedia defines MARC as follows:
MARC (MAchine-Readable Cataloging) is a bibliographic data format. It was developed in the USA in 1966. Over the years, numerous different versions followed, of which the MARC 21 version is still used by libraries worldwide. MARC 21 is a general format that can be read and processed by various applications. Its main purpose is the transfer of bibliographic data between libraries.
We are talking about a bibliographic data set that can be read by a computer.
Koha also uses MARC21, so we have to deal with it a little bit. There is a good introduction to MARC21. I can highly recommend it because it helped me to understand MARC21 better: Understanding MARC.
A MARC21 field consists of a tag (a three-digit number), two indicators and a subfield code. Here is an example of the ISBN field:
020 ## $a 0877547637
The first three numbers 020 stand for the MARC21 field or tag. The two “##” stand for the two indicators that are not defined for this field. With $a follows the subfield a for the ISBN. Finally, the ISBN. By definition, you can also specify an invalid ISBN in the $z subfield.
An overview of all MARC21 fields can be found here: https://www.loc.gov/marc/bibliographic/
MARC21 for school libraries
I really recommend everyone who wants to use Koha to read the above linked introduction to MARC, because it helps tremendously in understanding how Koha works and how to use it.
Export Framework
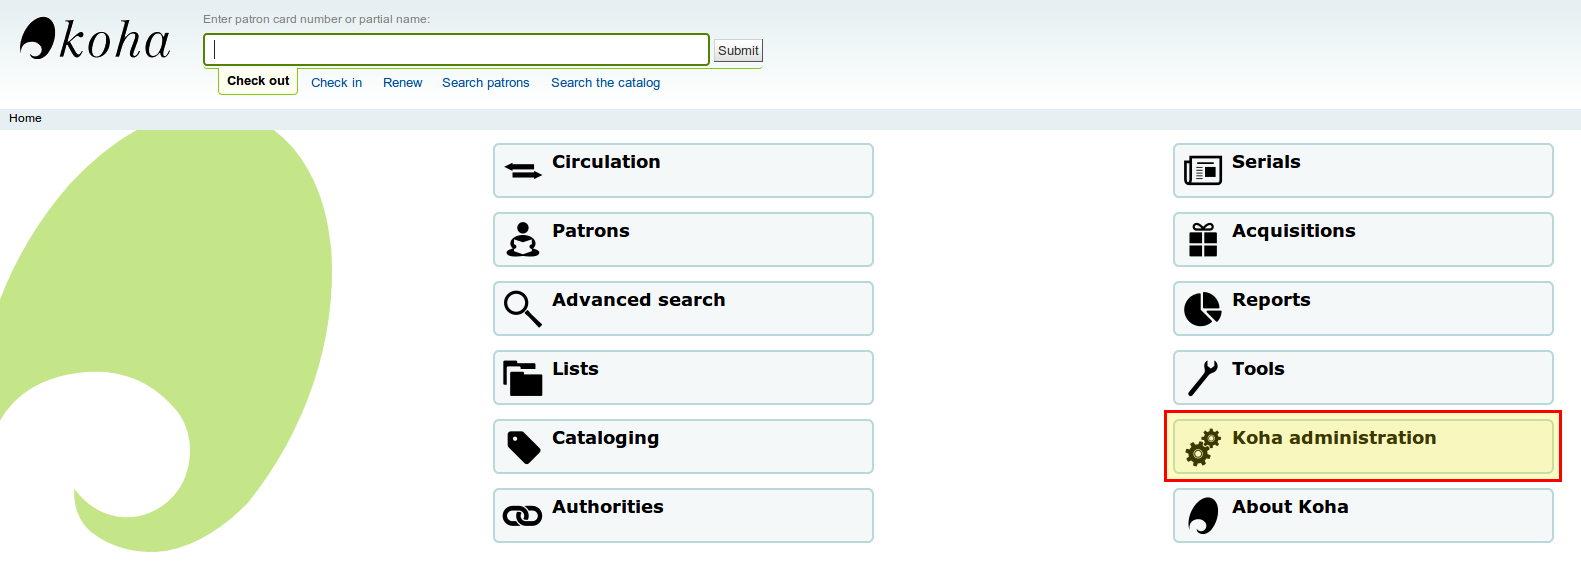
Since we now know roughly what MARC21 fields are, we want to adapt the bibliographic framework in Koha. To do this, we log in with our user created in part 1 and open the menu item Koha administration.
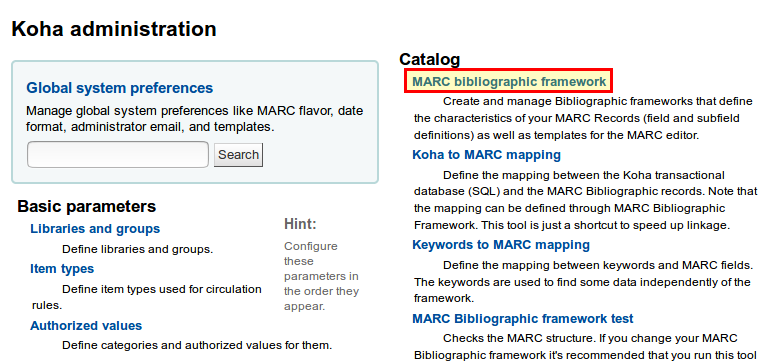
There we select the item MARC bibliographic framework.
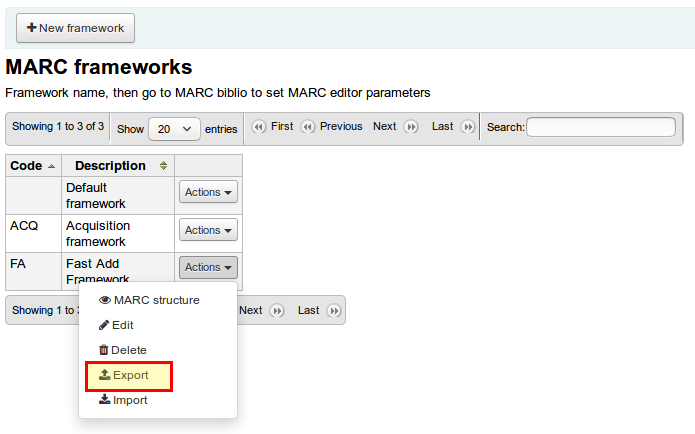
Here is a list of all bibliographic frameworks. We can theoretically create a framework for each media type, but we want it to be as simple as possible.
We can customize the framework well in the browser, but it is connected with a lot of clicking and waiting. Therefore we will export the framework, edit it and import it again.
In the list we click next to Framework with the code “FA” and the name “Fast Add Framework” on Actions → Export. (If the Fast Add Framework is missing, you forgot to check the appropriate box during installation…)
Customize
Now we have to open the downloaded file (you can choose between CSV, Exel or Open Document Format) with a spreadsheet software of our choice and customize it as follows.
In the first tab marc_tag_structure and the second tab marc_subfield_structure delete all lines with the tags:
- 010, 050, 082, 090, 099
In the second tab we will hide some more fields, so that the mask for the admission of the books becomes clearer. In the column hidden we enter “5” for the following tags and subfields:
- 020 → all except sub-field a
- 022 → all except sub-field a
- 100 → all except subfield a (and l optional)
- 245 → all except subfields a and b
- 250 → all except sub-field a
- 260 → all except subfields a, b and c
- 300 → all
- 500 → all except sub-field a
- 942 → all except sub-field c
- 952 → only subdivisions 2, b, e, f, i, j, l, m, n, q, r, s, u, v, w, y
Once we’ve done that, we’ve overcome a big hurdle in using Koha. What’s coming now is easier 🙂
Import Framework
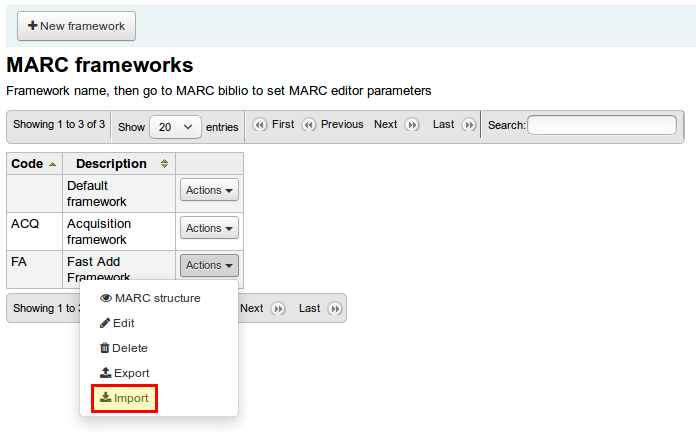
Now we have to re-import our edited framework. To do this, we click on Actions → Import and select our edited spreadsheet file that we have just edited. During import our “FA” framework is updated.
Conclusion
We have now set up a very important element in the configuration of Koha – our bibliographic framework! Almost everything is set up to record or import our media. The next part of this series deals with further basic settings for schools and the setup of further item types and user groups.


2 Comments
rupa roy · May 7, 2018 at 11:36 pm
Sir can you post me detail import which i will not been able to understand? please help me.
Part 1: Installation - How To Install And Set Up Koha For Schools | Open School Solutions · March 31, 2018 at 8:39 am
[…] Part1: Installation Part 2: The Bibliographic Framework […]