PfSense Web Filter With pfBlockerNG – Filter Ads and Malicious Websites
If you visit an average website today, countless scripts and trackers are loaded. This allows the website operators, Google, Facebook, etc. can collect data about you and track you through the vastness of the internet. Fortunately you don’t have to surrender to this hustle and bustle and there are many useful extensions e.g. for the browser (uBlock Origin, uMatrix, etc.). These solutions have the disadvantage that you have to install them on each device and for each browser separately. Therefore, I would like to describe how you can build a pfSense web filter with pfBlockerNG to filter advertising, unwanted content and malicious websites network-wide. This is useful in a home or school network, for example.
Install pfBlockerNG
First we log in to pfSense and open the Package Manager. There we select pfBlockerNG-devel under “Available Packages”:
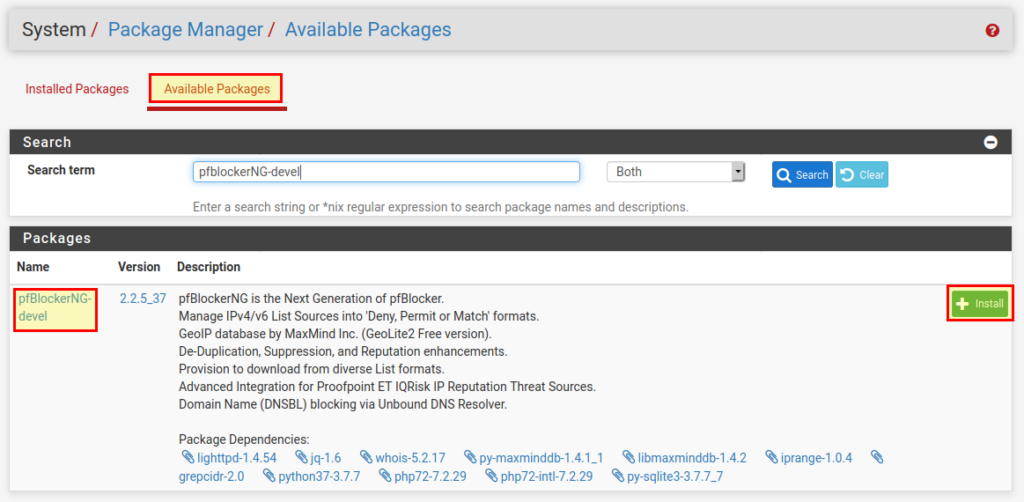
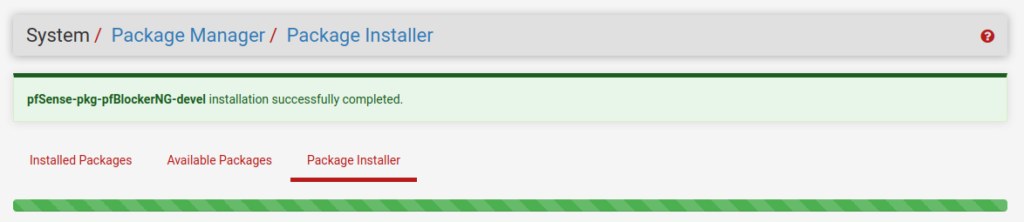
With “Install” we can install the package. PfSense will download the pfBlockerNG package and add it to the firewall.
pfBlockerNG Initial setup
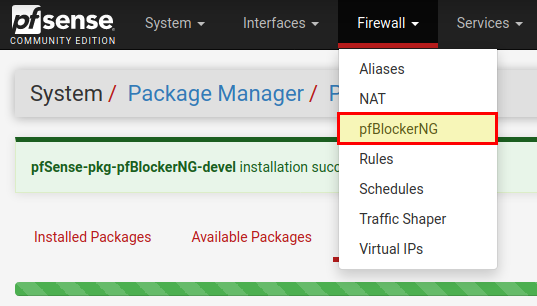
Next we will configure pfBlockerNG. For this we go to Firewall → pfBlockerNG.
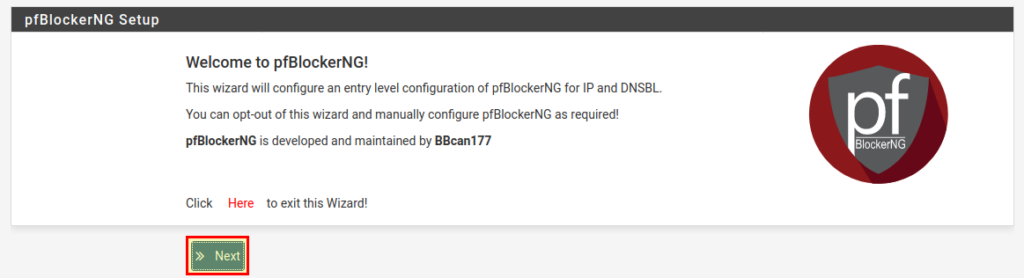
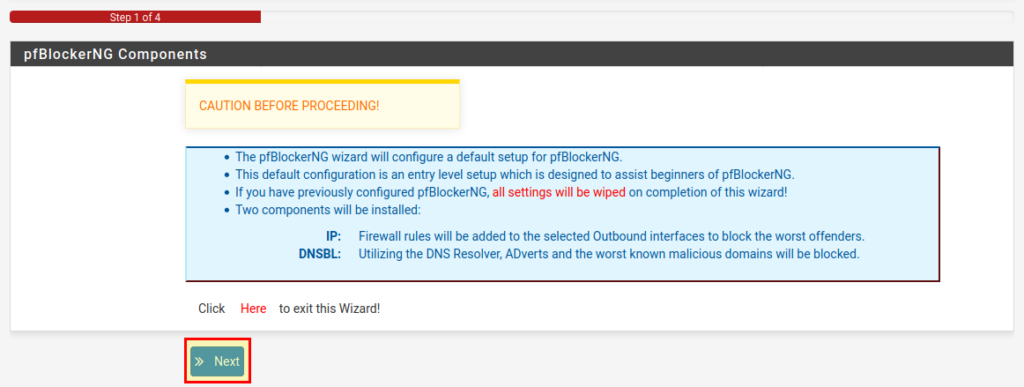
An assistant welcomes us who will help us to set up pfBlockerNG. With “Next” we continue.
The next page explains which things are now being set up:
- A standard setup for beginners with pfBlockerNG is set up.
- If you have installed pfBlockerNG before, all settings will be deleted.
- Two components will be installed:
- IP: Firewall rules for the WAN interface to block the worst known attackers.
- DNSBL: advertising and other known malicious domains are blocked.
Continue with “Next”.
In the next step we have to select the incoming interface (WAN) and outgoing interface (LAN). If you have more than one internal interface, you can select all the ones you want to set up pfBlockerNG for. For example, if you want to filter the guest WLAN, but not the WLAN for the teachers, you can select or deselect the appropriate interfaces here.

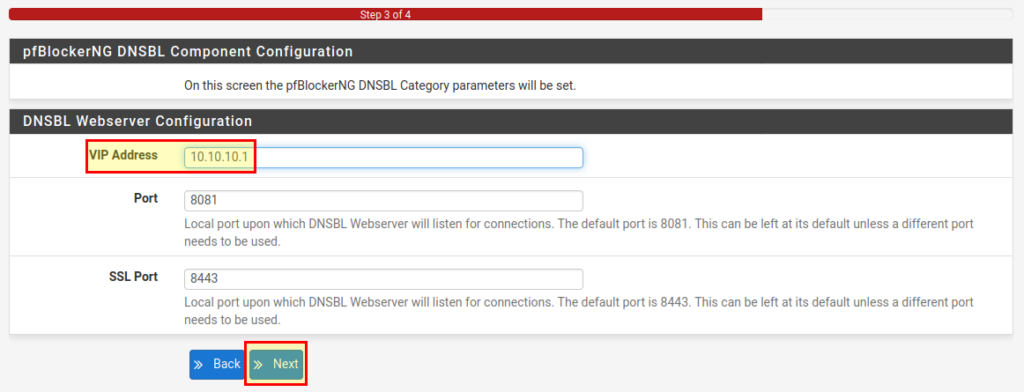
Next we have to define a so-called VIP address. On this address the web server of pfBlockerNG is running and under no circumstances should it be an IP from a network you use! For example, if the LAN network is 192.168.1.1/24, the VIP address should not be in this range. Here in our example we leave the address at 10.10.10.1. Usually you don’t have to change the ports.
The setup is now complete, and we can finish the wizard by clicking on “Finish”.
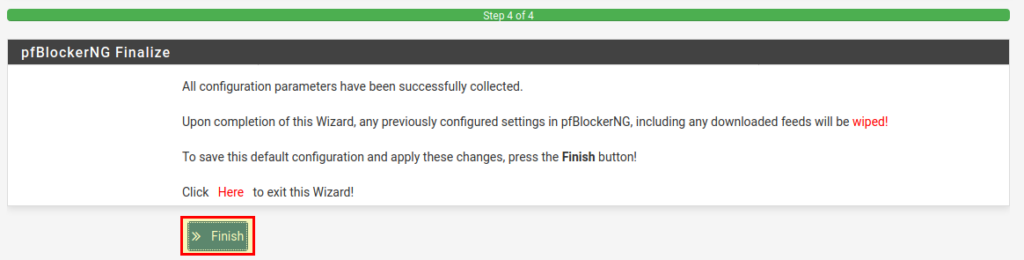
After that the pfBlockerNG update page opens and all activated block lists are automatically downloaded and activated.
You have now a basic pfSense web filter with pfblockerNG running!
pfBlockerNG Configuration
We now have a ready to use pfBlockerNG setup that blocks unwanted ads and malicious domains and websites. pfBlockerNG is a very powerful & flexible tool. Therefore, I would like to highlight a few settings.
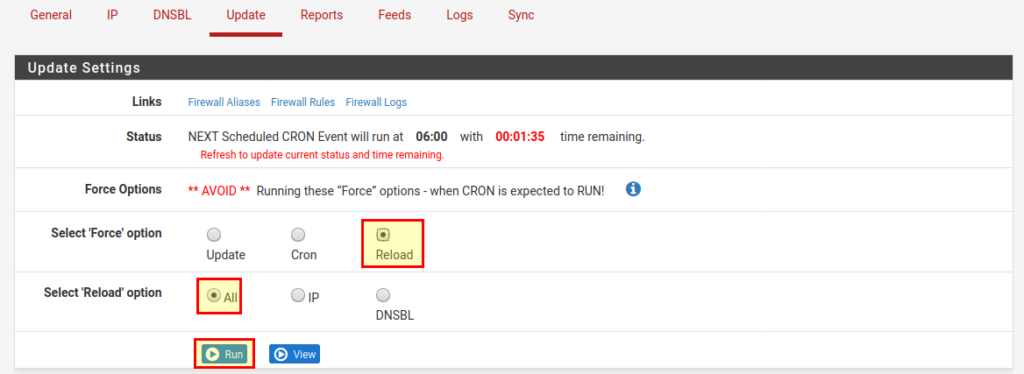
Important: In order for changed settings to take effect (no matter if DNSBL or IP), we have to run Update → Reload → All → Run to download and activate the (changed) lists.
IP
In the IP tab, I recommend the following settings:
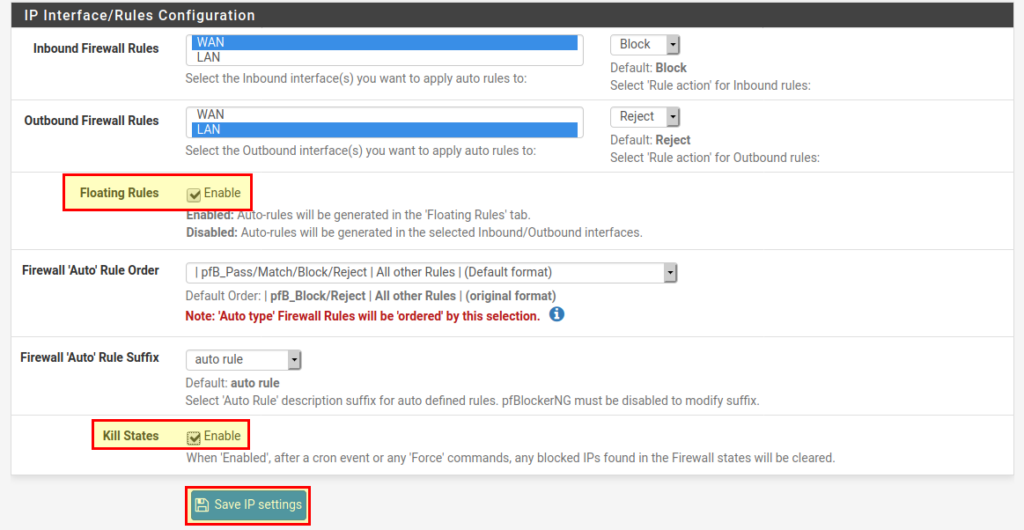
- Floating Rules → Enable. If you have only one internal interface, you can leave it disabled. If you have many interfaces (e.g. in a school network), it makes sense to activate this item to keep the firewall rules clearer.
- Kill States → Enable. When pfBlockerNG updates the block lists, all active connections to IPs in the lists are reset.pfblockerNG IP Settings
GeoIP Blocking
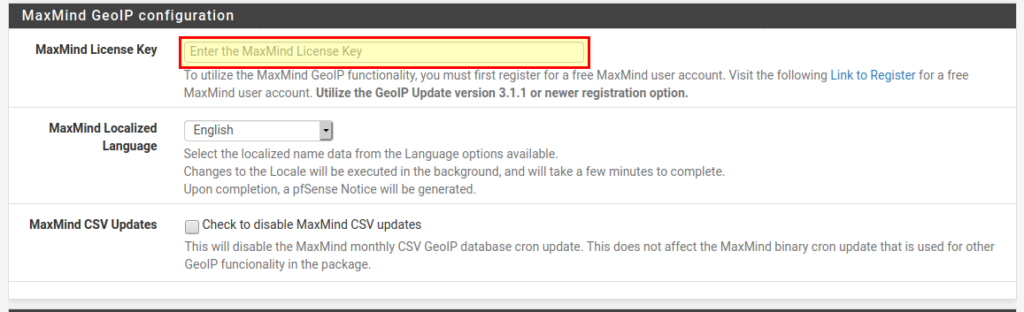
If you want to block access from certain regions of the world, you must first create a free account at MaxMind. Thereupon you receive a license key, which you can enter under IP → MaxMind GeoIP Configuration. After that you have to download the GeoIP databases under Update → Reload → IP.
Now we can select the desired continents or top spammers under IP → GeoIP. To do this, we click on the small pencil on the right and then select all entries in the list. At the bottom we select “Deny Both” (List Action).
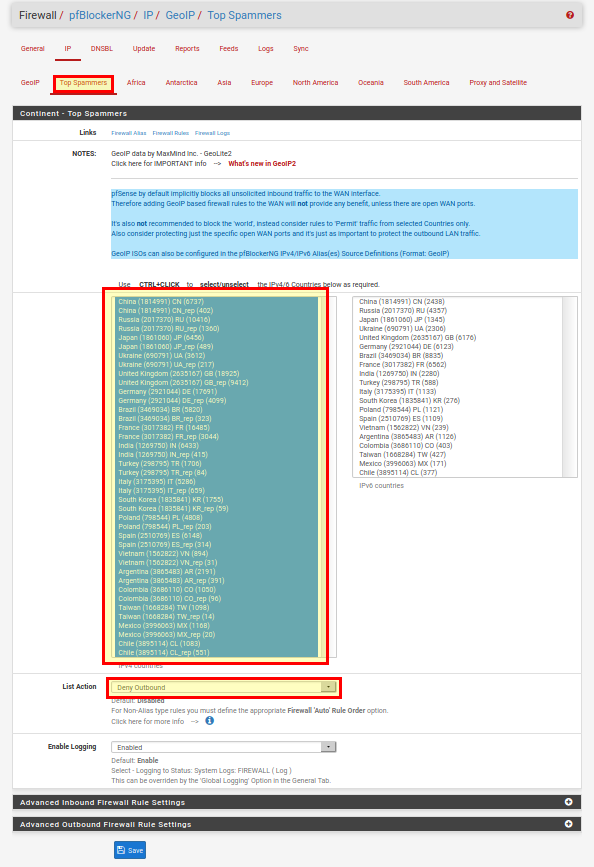
Note on “Deny Inbound” and “Deny Outbound”: “Deny Inbound” means that the IPs are blocked for all incoming connections. For example, if you run a web server and you want to block certain countries, you can do this with “Deny Inbound”. “Deny Outbound” applies to all outgoing connections, i.e. I cannot connect to this IP from a computer in the network. You have to be careful here! For example, if I block all IPs of North America with “Deny outbound”, from now on I can’t reach websites hosted on this continent anymore!
DNSBL / Feeds
pfBlockerNG blocks domains as well as IPs. So there is no man-in-the-middle attack to filter content, it simply looks into a long list to see if a domain is allowed or not (works also with HTTPS). Under Feeds, we can set which lists should be actively used. There are feeds for IP block lists as well as for DNSBL – block lists for DNS or domains.
All activated feeds have a tick at the end of the line. If we now want to add a feed that is not yet active, we simply click on the “+”:

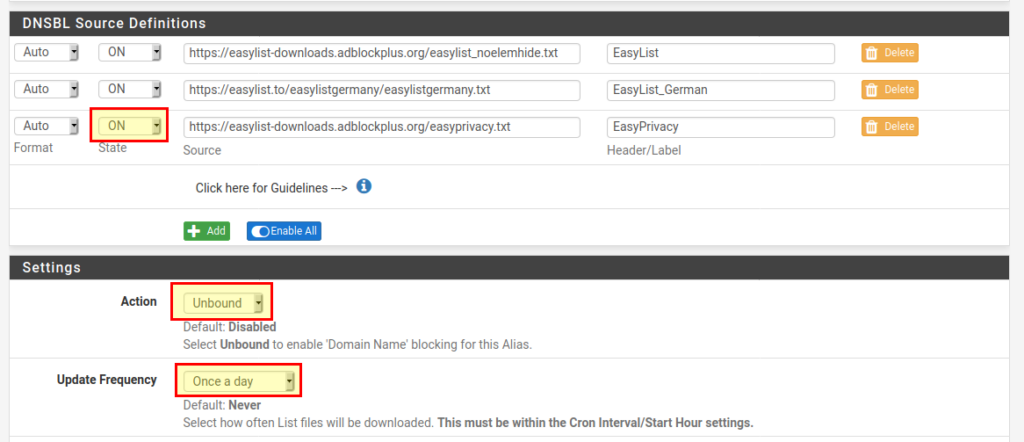
A page will open where we can enter details about the feed. The following fields are important:
- State: ON
- Action: Unbound
- Update Frequency: Once a day
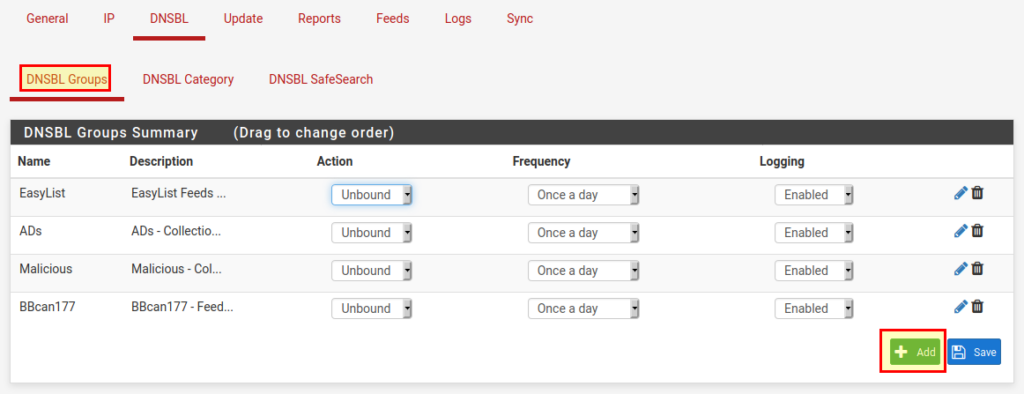
Sometimes you want to add a feed that is not in the list (e.g. individual feeds from Steven Black). To do this we go to DNSBL → DNSBL Groups and click on “Add” at the bottom:
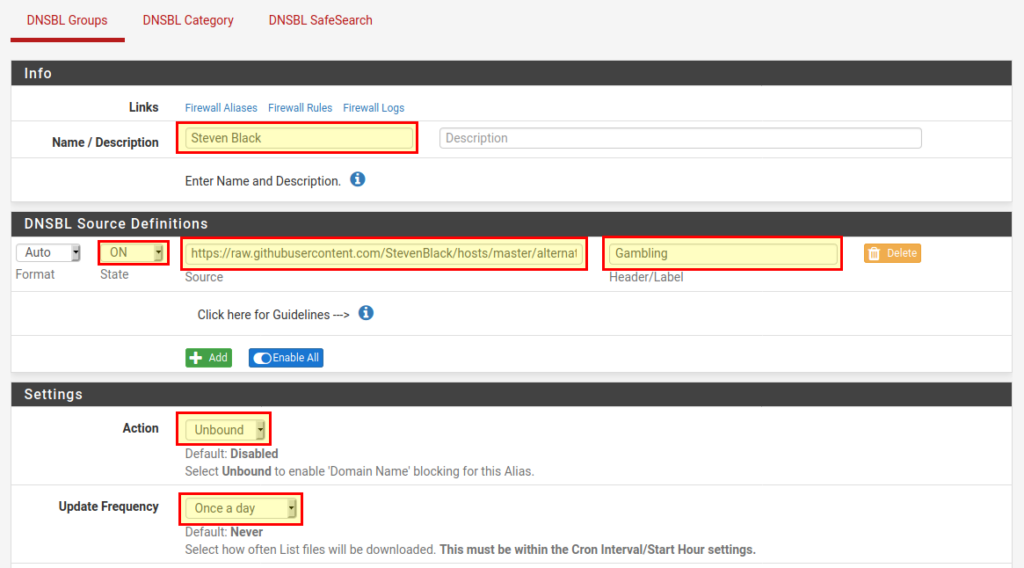
On the next page we give the DNSBL group a name and add DNSBL Source Definitions to our feed(s).
- Name: StevenBlack
- State: ON
- Source: https://raw.githubusercontent.com/StevenBlack/hosts/master/alternates/gambling/hosts
- Header / Label: Gambling
- Action: Unbound
- Update Frequency: Once a day
With “Save” we finish the process.
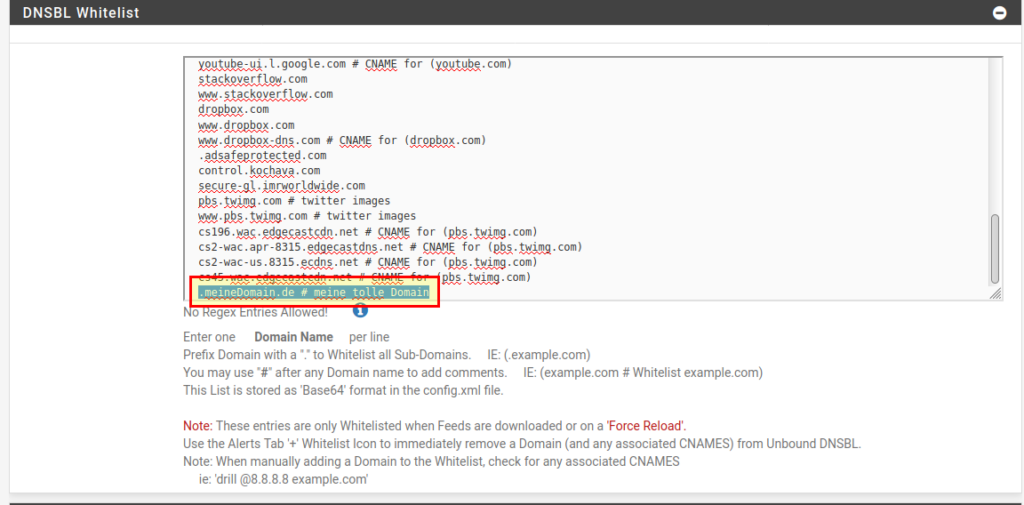
Whitelists
If you want a domain not to be blocked, it must be added to the whitelist at DNSBL → DNSBL Whitelist. If you put a dot (“.”) in front of the domain name, all subdomains will be whitelisted, otherwise only the (sub)domain you have entered won’t be blocked.
SafeSearch
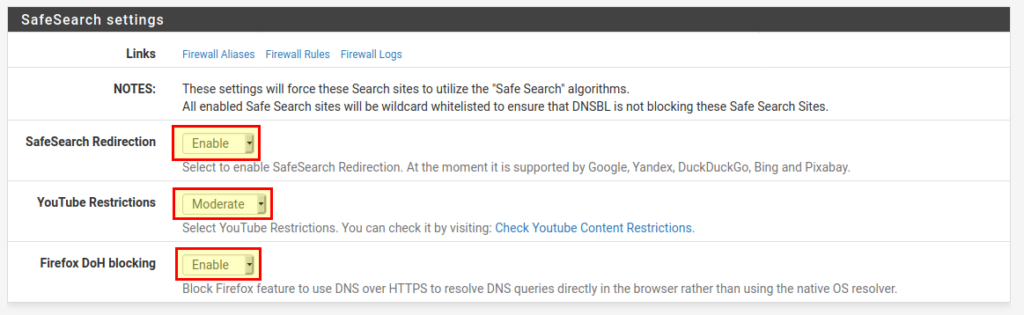
At DNSBL → DNSBL SafeSearch you can set SafeSearch for the most popular search engines. You can also block DNS over HTTPS from Firefox and set restrictions for YouTube.
Force pfSense as DNS server
To make sure that all requests in our network are also filtered by pfBlockerNG, we have to prevent that someone in the network uses a different DNS server than the DNS server of pfSense. For this purpose we create 2 rules for the LAN interface (more details here):

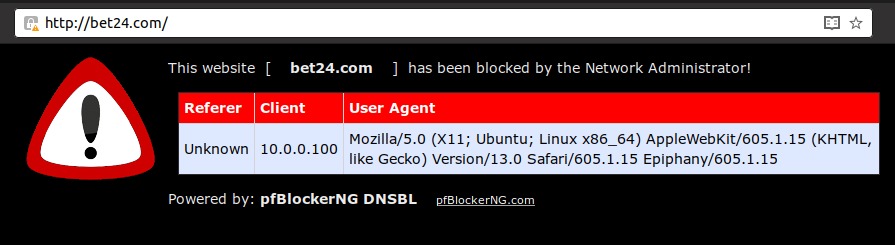
Testing
If we want to open a website, that is in the DNS block lists, we will see this pfBlockerNG site:
pfSense Web Filter with pfBlockerNG – Conclusion
pfBlockerNG is a great Open Source project. It helps to filter advertising, unwanted or malicious content and whole IP ranges. No matter if IPs or DNS block lists – with pfBlockerNG you can manage both and configure it the way you want it for your network. But there are also alternatives for pfBlockerNG, e.g. pi-hole, which can be installed on a Raspberry Pi or in a VM or container. The bottom line is that an ad-free network is possible!
Do you use pfBlockerNG or pi-hole in your (school) network?


0 Comments