Part 5: Label Creator – How To Install and Set Up Koha For Schools
Koha is one of the best open source projects I know. It’s a very flexible solution, which takes some time to get used to. However, we have already worked through most of the points, especially the installation (part 1) and the bibliographic framework (part 2). In the last part we have cataloged some books. However, before we can start loaning books or other media, each book needs a barcode. We also need to establish rules for borrowing. Today we are talking about the label creator.
This article is part of a series:
- Installation and Setup of a First Library
- The Bibliographic Framework
- Basic Settings
- Cataloging
- Printing Labels
- Circulations and Fines Rules
- Connecting to a Z.39.50 / SRU Server
- Notifications and Reminders
- Overdue Notices and Fees
Label Creator Preparation
For the barcodes in our library we use simple adhesive labels. As an example we take an A4 sheet with 27 55x30mm labels. On it we want to print our barcode, as well as the title and ISBN of the book. For the label printing we have to create two things:
- a layout for the label, i.e. what information should be printed on the label?
- a template of the label sheet, i.e. how many labels are on one sheet? What is the size of the label? What is the distance?
Create a Label Layout
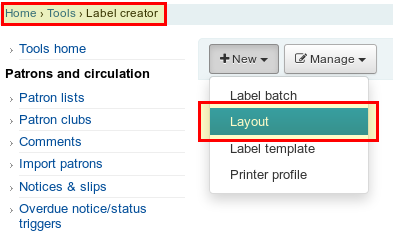
We first create a layout for our label with all the information we want to have later next to the barcode. To do this, we go to Tools → Label Creator and create a new template with New → Layout.
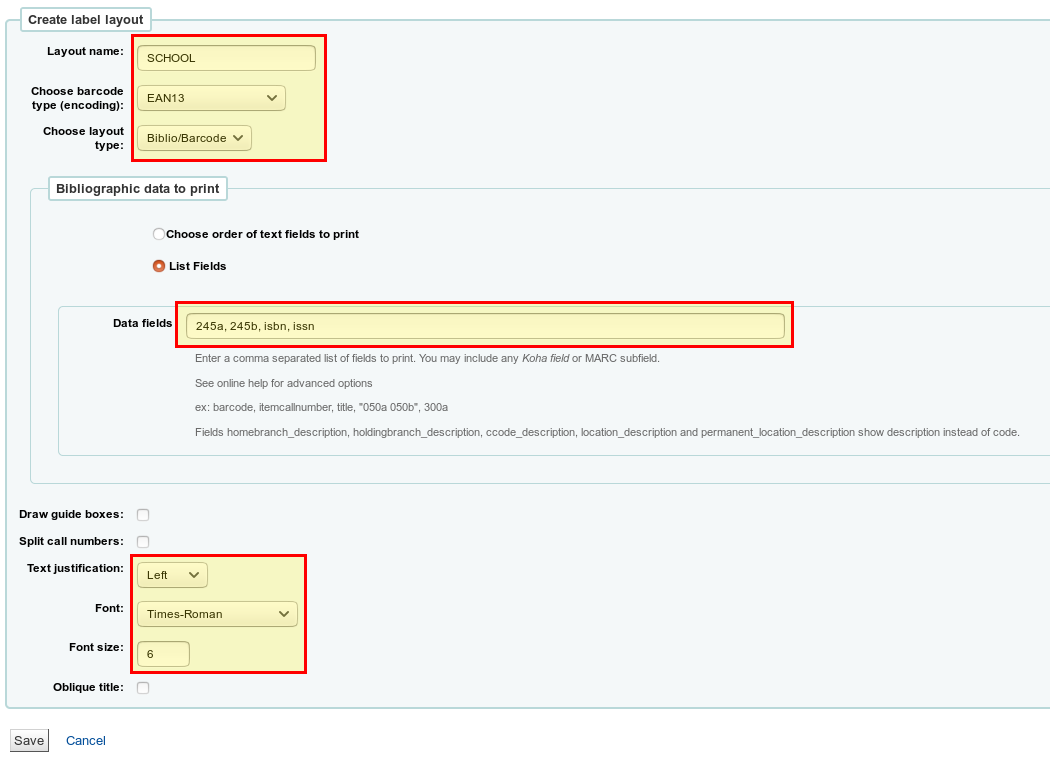
Now we have to make different specifications:
- Layout name → can be freely chosen
- Barcode type → EAN13
- Layout type → Biblio/Barcode (i.e. first the title and then the barcode is printed)
- Bibliographic data → Here we select list fields (i.e. we can enter the Marc21 tags directly).
- Data fields → 245a, 245b, isbn, issn (I had problems getting the layout the way I wanted it, with the data fields and the Marc21 tags it worked then)
- Further down you can specify the font size and type (here you have to experiment a little bit, how you want it to be).
At the end we click on Save.
Create a Label Template
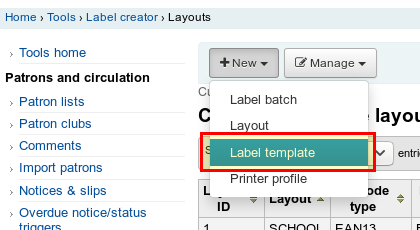
Now that we have created our layout for the label, we have to tell Koha what our label sheet looks like. Therefore we create a new template with New → Template.
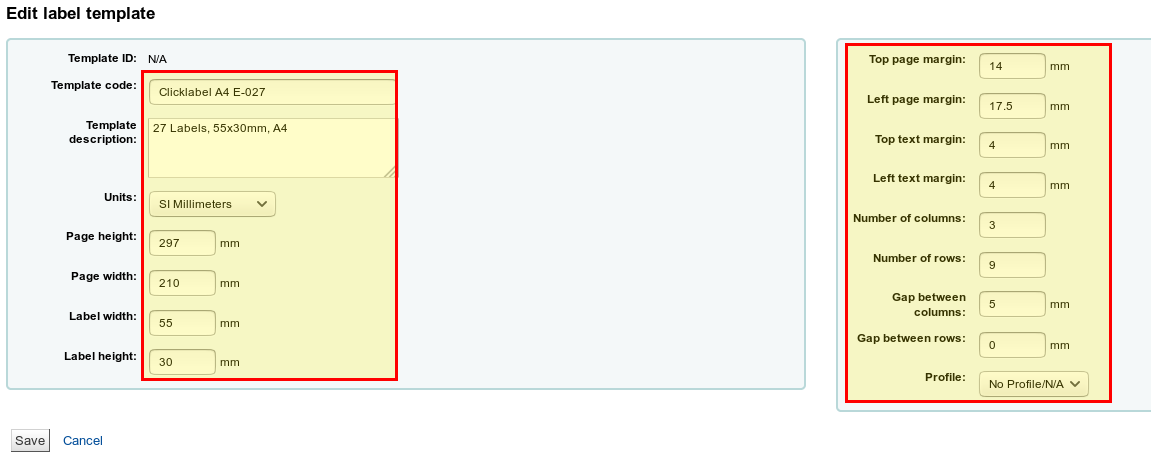
The following information is required in the input mask:
- Template code and description → can be chosen freely
- Units → mm or cm, depending on how you want to indicate the dimensions (I have taken mm in our example)
- Page height and width → Height and width of the label sheet (A4 for us)
- Label width and height → Label size
- Top page margin → Distance from top to margin of first label
- Left page margin → Distance from the left margin to the margin of the first label.
- Top and left text margin → Distance of text from edge of label
- Number of columns and rows → How many rows and columns does the sheet have?
- Gap between columns → Distance between labels (right / left)
- Gap between rows → Distance between labels (top/bottom)
At the end, click Save again.
Printing Barcodes
Now we have prepared everything and can print out our barcodes of the already cataloged media. For this purpose we create a new label batch with New → Label batch.
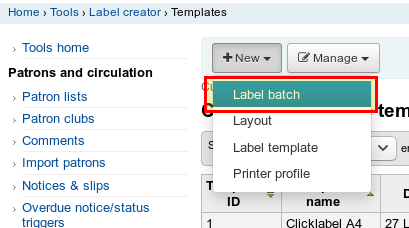
A new input field opens where we can enter our barcodes. As long as the input field is empty and we click on Add Item(s) below, a new window opens, where we can simply search for the barcodes of our media.
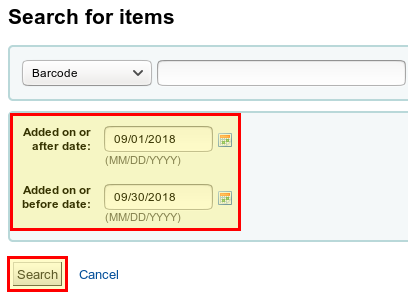
You can specify a time period in which you want to search for recorded copies. After clicking on Search, you will be presented with the results:
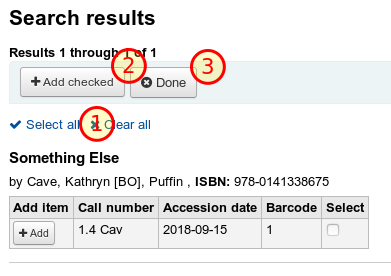
Since we want to add all the items, we click Select All above, then Add Checked and finally Done. Now all our copies are in the input field and we can add them to our label batch with Add Item(s).
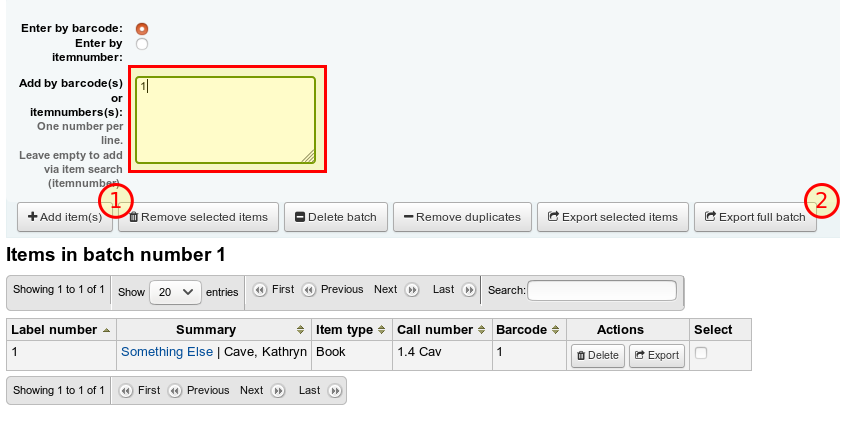
Now we can export all labels in our batch with Export Full Batch and print them. A popup will open. There we select our label layout and the template. In addition, we can also specify the label on the sheet for which the printout is to start later. This is especially practical if you have used label sheets.
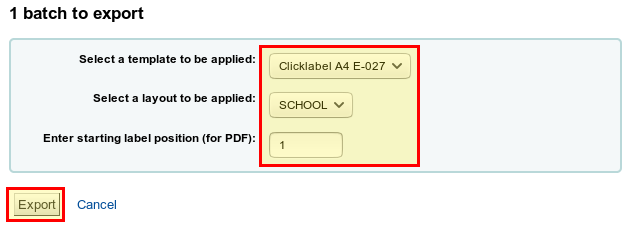
Finally click on Export and we can then download the print template as a PDF file.
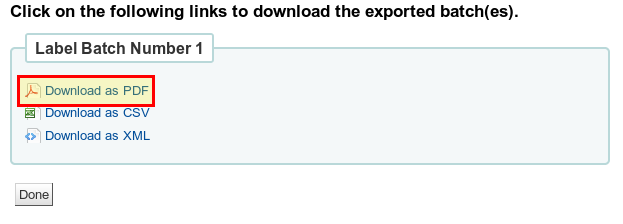
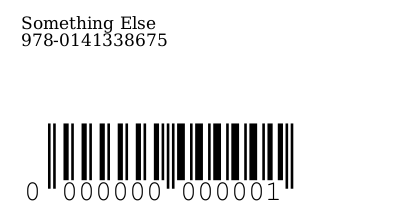
Our barcodes 🙂 are ready. We can now print them out. When printing, we have to make sure that no page scaling or automatically reduced to the print area, otherwise you are no longer correct measurements. In Ubuntu it looks like this:

Title and ISBN help us to stick the label into the right book later.
 Conclusion
Koha’s label creator tool is very flexibly adjustable. Once we have created our layout and template, printing the labels later is no longer an obstacle. I recommend in any case some test prints on normal paper, in order to examine the distances and the layout of the labels. In the next part we will continue with the loan conditions.
Looking for high quality Open Source Apps for your classroom?


0 Comments