How to Install pfSense 2.4
pfSense is one of the most widely used open source firewall solutions. We have been using it in our school for several years now and are very satisfied with it because it simply offers many features for which you have to invest a lot of money elsewhere. Today I want to show you how to install pfSense and how to set it up. Before that, I’d like to talk about various hardware that is suitable for running pfSense.
What hardware do I need?
In general, you can say that you can theoretically use any computer with at least two network cards to run pfSense. This could be, for example, an old computer which you no longer need and which you equip with a second network card. But often an old computer is not very energy efficient and other alternatives are more appropriate. In addition to power consumption, the intended use case plays a decisive role. It makes a difference whether I use the firewall at home with a few users or in a school or a company with considerably more accesses.
For home use the APU2C4 board from PC Engine is popular (mainly in Europe), but also passively cooled mini computers like this or that one. For a school or company, a board with at least 4 network cards is recommended, depending on the requirements. We use a SG-4860 from Netgate. If you search for pfSense at Amazon or AliExpress, you will find many offers. The only important thing is that the CPU supports AES-NI, because this feature of pfSense will be absolutely necessary in future versions.
On the website of the pfSense project there are some general hints about the hardware requirements:
- Minimum → 512MB RAM, 500 Mhz CPU
- Recommended → 1GB RAM, 1Ghz CPU
The available bandwidth should also be taken into account when selecting hardware, otherwise pfSense could become a bottleneck.
- 10-20 Mbps → Intel or AMD CPU with at least 500MHz.
- 21-100 Mbps → current Intel or AMD CPU with 1Ghz
- 101-500 Mbps → current Intel or AMD CPU with at least 2 Ghz and one PCI-e network card
- 501+ Mbps → Server hardware with multi-core CPUs with at least 2 Ghz each, PCI-e network card
Preparing the pfSense Installation
Download image
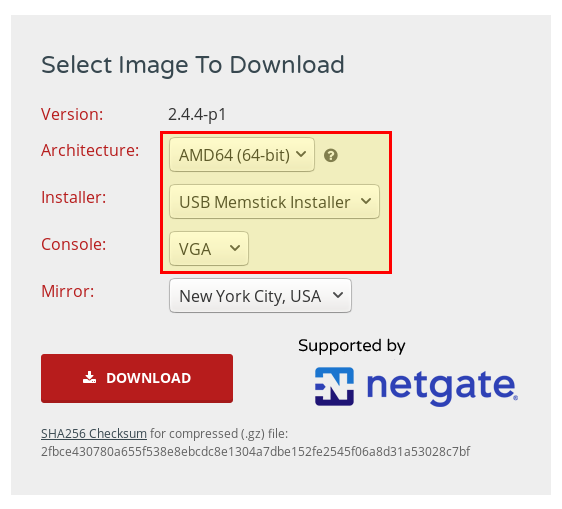
Before starting the installation, you need to know which pfSense image you need. This depends, for example, on whether the hardware used has a VGA/HDMI output or only a serial console. Or whether you want to install via CD, USB flash drive or directly on the hard disk. Therefore I would like to give some hints here:
Architecture:
- You only need Netgate ADI if you also use a Netgate product.
- AMD64 for everything else (Intel / AMD 64bit CPU)
Type of image
- USB Memstick Installer is required for the installation with a USB stick.
- CD Image (ISO) Installer is used for installation with a CD or for virtual machines
Console
- Serial – if only one serial port is available (USB or RS-232)
- VGA – if the hardware used has a VGA/DVI or HDMI output.
If you know which image you need, you can download it from the pfSense website.
Prepare USB Flash Drive
The pfSense documentation contains a lot of information about preparing a USB flash drive. In our example we assume a USB Memstick VGA Installer. First you should format or empty the USB stick. This is very easy under Linux with
$ sudo dd if=/dev/zero of=/dev/sdz bs=1M count=1
Note: It is essential to pay attention to which device is specified after of=/dev/. Otherwise it can happen that you empty your main partition and data is irretrievably lost! To find out the device name, it is best to plug in the USB stick and then run
dmesgin a terminal. Then you can see which device name the USB stick got (often it is /dev/sdb).
Instructions for clearing a USB flash drive under Windows or macOS can be found in the documentation linked above.
Now you can write the downloaded image to the USB flash drive.
$ gzip -dc pfSense-memstick-2.4.4-RELEASE-amd64.img.gz | sudo dd of=/dev/sdz bs=1M
$ sync
The USB flash drive is now ready. Next boot from this USB thumb drive and start the installation. Depending on the BIOS, the stick will be recognized as a USB device or another hard disk. The boot sequence has to be changed often to avoid booting from the 1st hard disk. The documentation also provides some ideas if booting does not work.
Install pfSense
After successful booting, the pfSense welcome screen appears.
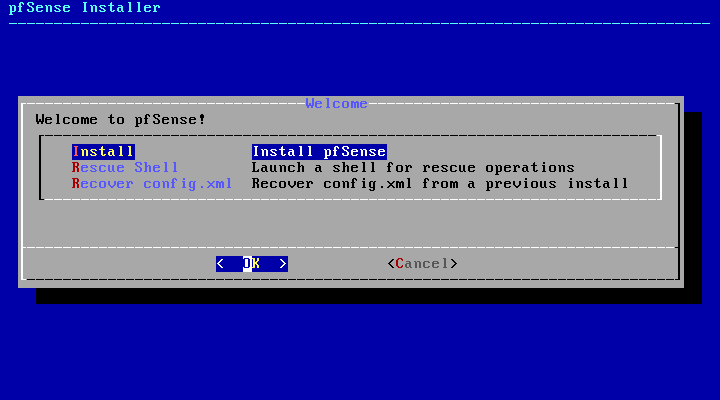
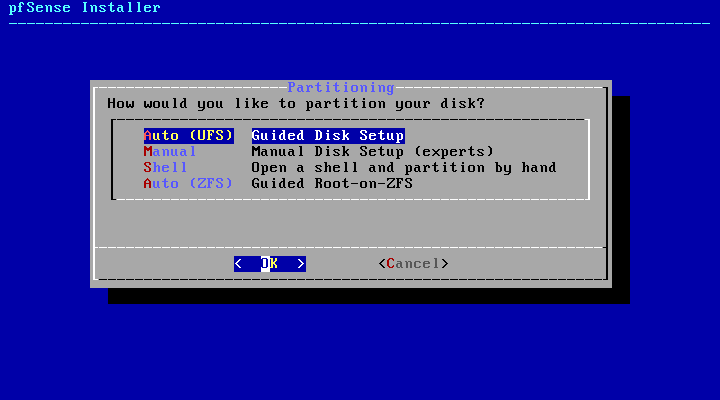
Here you choose “Install“. In the next dialog you can define the keyboard layout. For partitioning it is best to use “Auto (UFS)” and confirm again with Enter.
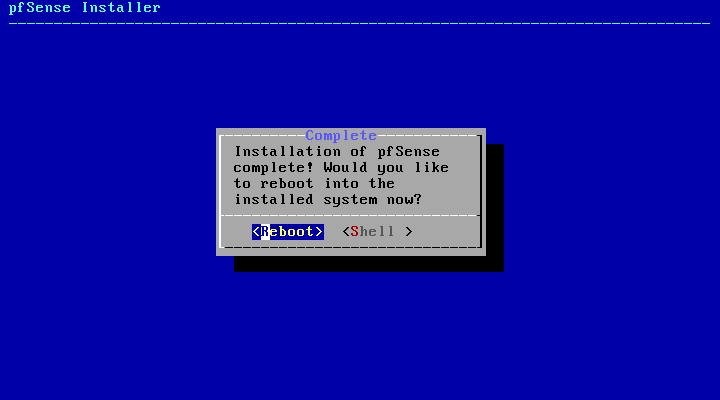
Then the automatic installation starts. When the installation is finished, you will be asked if you want to open a shell (you can deny that). Finally you have to restart the system (“Reboot“). At the following boot you should make sure that you do not boot from the USB flash drive again, but from the hard disk!
Setting up Network Interfaces
Assign Network Interfaces
During the restart pfSense automatically tries to configure the WAN interface. The WAN interface is the network card that is connected to the Internet service provider’s router or to the Internet in general. If the automatic configuration is successful, the pfSense console menu will appear, otherwise you will be greeted with a dialog.
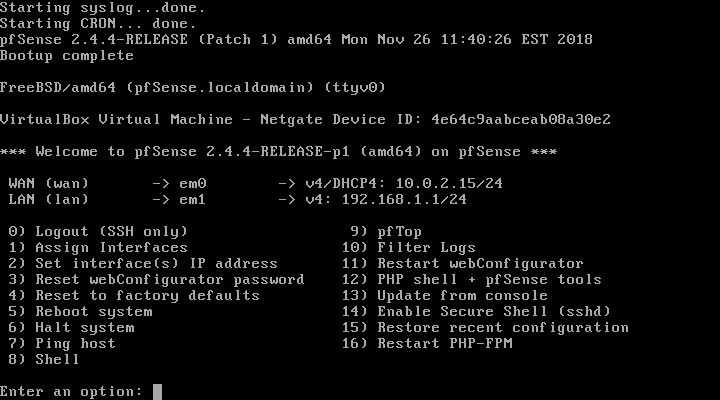
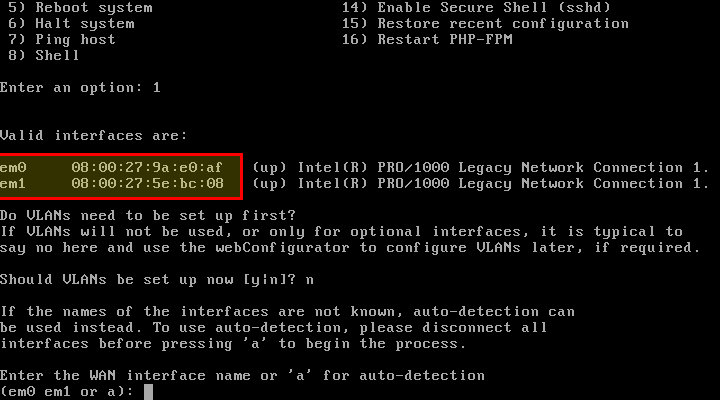
To change the WAN and LAN interfaces, select No. 1 “Assign Interfaces”. Now you have to answer some questions:
- Should VLANs be set up now? → n (No)
- Enter the WAN interface name or “a” for auto-detection → Here you have to enter the name of the WAN network card. The MAC addresses are displayed at the beginning of the dialog. In our example it is called em0.
- Enter the LAN interface name or “a” for auto-detection → Here you have to enter the name of the LAN network card. In our example it is called em1.
- Do you want to proceed → y (Yes). A short summary of the assignment will be displayed beforehand.
Set IP addresses
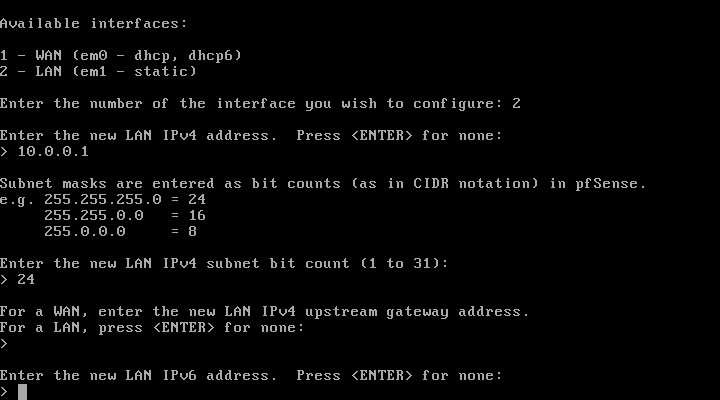
If a DHCP server is running on the WAN interface, it should automatically have an IP address. If not, you have to configure an IP address for both the WAN and the LAN interface. As an example I will show it here for the LAN interface. Select No. 2 “Set interface(s) IP address“.
- Enter the number of the interface you wish to configure → 2 for the LAN interface
- Enter the new LAN IPv4 address → e.g. 10.10.10.1 or 10.10.10.1/24
- If you did not specify a network mask in the previous step, you have to do it now: Enter the new LAN IPv4 subnet bit count (1 to 31). → 24 (equivalent to 255.255.255.0, i.e. 254 IP addresses).
- In the next question a gateway must be defined. This is not necessary for a LAN interface, only for a WAN interface. → Simply press ENTER (for None).
- Enter the new LAN IPv6 address. Press <ENTER> for none → ENTER (for none)
- Do you want to enable the DHCP server on LAN? → y (Yes), unless there is already a DHCP server in the LAN network.
- Enter the start address of the IPv4 client address range → 10.10.10.10 (first IP address a client can get in the LAN network)
- Enter the end address of the IPv4 client address range → 10.10.10.200 (last IP address a client can get in the LAN network)
- Do you want to revert to HTTP as the webConfigurator protocol? → n (no, HTTPS should remain)
Further Settings in the Web Interface
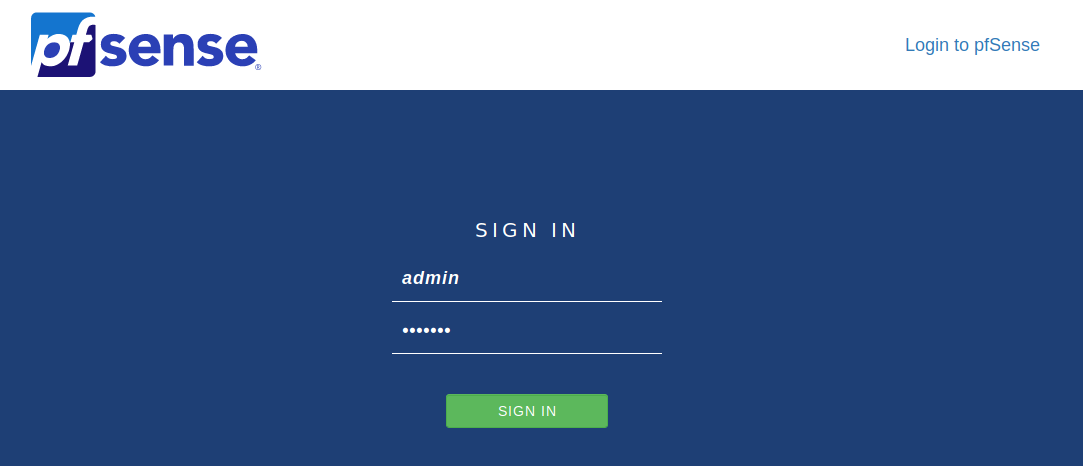
With a computer that is also connected to the LAN network, you can access the pfSense web interface at https://10.10.10.1 to make a few basic settings. The first time, a certificate warning appears. Since this is a self-signed certificate for the HTTPS connection, you have to accept it. The default credentials are admin with the password pfsense.
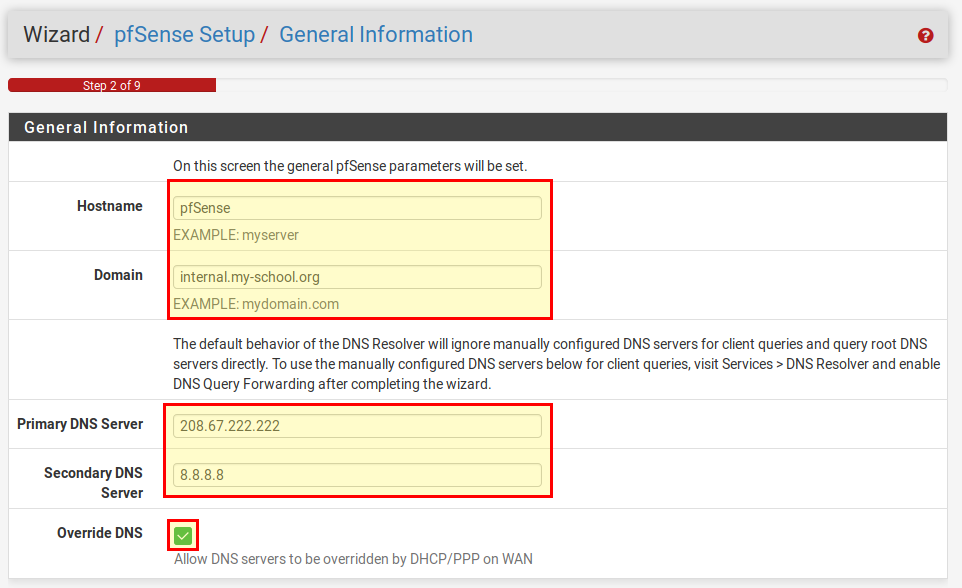
After login you will be greeted by an assistant. In the second step you can assign a host name to the firewall and enter the domain. Also important is the primary and secondary DNS server and whether the DNS server can be overwritten via DHCP at the WAN interface (e.g. to use the DNS of the Internet service provider).
In the next steps you set the time zone, check the configuration of the WAN and LAN interface again and should assign a new admin password in step 6. This completes the setup.
Conclusion
Installing pfSense is usually easy. Sometimes it is difficult to choose the right image for the installation or booting from a USB stick or to set up the serial connection. The pfSense documentation deals with many of these problems and offers suggestions for solutions. After the initial configuration, the firewall is ready for use. However, the firewall can still be greatly extended and adapted. This should be the topic of future articles.


0 Comments